Hey there! If you’re reading this, you probably own a bag closer machine—whether it’s for your small snack packaging line, a grain storage facility, or a textile factory—and you know how much of a lifesaver these things are. I’ve been supplying bag closer machines for over a decade now, and let me tell you, the number one mistake I see new users make is ignoring basic maintenance until the machine breaks down mid-shift. That’s not just a hassle—it can cost you thousands in lost production, not to mention a bunch of stressed-out team members rushing to fix something they didn’t have to. Today, I’m breaking down exactly what you need to do to keep your bag closer machine running smoothly, no fancy tools or engineering degree required. I’m keeping this real, no jargon, just stuff that actually works from someone who’s seen these machines in action every single day. Bag Closer Machine
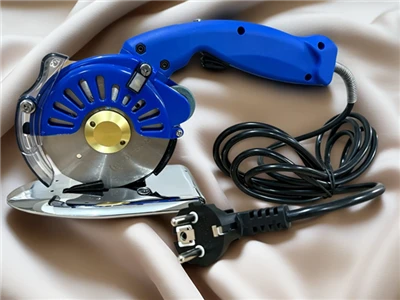
First off, let’s get one thing straight: bag closer machines aren’t some “set it and forget it” kind of gear. I’ve had customers call me at 2 a.m. panicking because their machine seized up on a pallet of rice bags, and when I ask what their maintenance routine was, most say they oiled it once when they unboxed it—like, two years ago. C’mon, guys. These machines are moving parts working nonstop, stitching through thick woven polypropylene, paper, even jute. They need attention, but it’s the good kind—small, consistent checks that take 10 minutes a day, not hours of downtime.
Let’s start with the daily stuff. When you wrap up your shift (or even mid-shift if you take a quick break), do a 5-minute wipe-down. Grab a dry microfiber cloth—don’t use that harsh industrial cleaner you keep for the factory floor, that can strip the little lubricants we built into parts—and wipe off all the loose dust, lint, and bag debris. Lint is the enemy here, by the way. It gets into the needle area, the loopers, the tension springs, and acts like sandpaper. I once went to a customer’s plant where a bag closer machine had a whole clump of lint stuck in the hook mechanism, and the looper burned out in 2 weeks because of it. That’s a $800 part for no reason.
While you’re wiping, check the needle and looper. Those are the two most important parts, and they’re super easy to inspect. The needle should be sharp, no bends or nicks. If you run your finger (very gently, mind you) along the edge, if it catches, it’s time to swap it. And don’t just keep one needle in the drawer—keep 5 or 6 on hand, because a dull needle not only causes bad stitches, it makes the motor work harder, which shortens its life. The looper is the curved metal part that catches the needle thread to form the stitch. Make sure it’s not bent, and there’s no thread wrapped around it. Even a tiny bit of thread wrapped around the looper can throw off the entire stitch pattern, leading to loose seams that split open during shipping. That’s a whole other problem—you don’t want a truckload of your product arriving with burst bags, trust me.
Next, after the wipe-down, hit it with a light oil. But not just any oil! Use the high-quality sewing machine oil we recommend, not that 3-in-1 stuff from the hardware store. That’s too thick and can gum up the works. Put 1-2 drops on the needle bar, the looper shaft, the tension dial, and the handwheel. Don’t overdo it—too much oil will get on the bags, especially if you’re packaging food or other products that need to stay clean. Wipe off any excess with that same microfiber cloth. I’ve had customers ask me “why oil daily?” and the answer is simple: these parts move fast, and they need that thin layer of lubrication to keep from wearing down. If you skip this, you’ll be replacing the needle bar in 6 months instead of 2 years.
Now, what about weekly maintenance? You can’t just do daily stuff and call it good. Once a week, you need to dig a little deeper. First, remove the needle plate. It’s usually just a couple of screws, easy to take off. Underneath that is where all the lint and debris hides. Use a small brush (an old toothbrush works great, just don’t use the one you use for your teeth!) to scrub out all that gunk. Once it’s clean, check the feed dogs—those little metal teeth that pull the bag through. Make sure they’re not worn down or bent. If they are, the bag will slip, leading to uneven stitches. A quick fix here is to tighten the set screws on the feed dog, but if they’re too worn, you’ll need to replace them.
Also, check the tension settings this week. If your stitches are too loose or too tight, that’s a tension issue. The top tension dial and the bobbin tension—most machines have a small screw on the bobbin case for that. To check it, run a few test stitches on a scrap piece of the same bag material you use. If the top stitch is loose, turn the top tension dial up a little. If the bottom stitch is loose, tighten the bobbin tension. I tell customers to write down the tension settings when they first get the machine, so if it goes out of whack, they can just reset it instead of guessing. That saves so much time.
Another weekly task: inspect the power cord and any air lines if your machine is pneumatic (some of the heavy-duty ones are). Look for frays, cracks, or loose connections. If you see a fray, don’t try to tape it up—replace the cord. I know factory downtime is scary, but a power cord fire is way worse. And if you have an air-powered machine, check the air filter. A clogged air filter will make the machine run slower, so replace it every 3 months, or once a week if you’re running 24/7. It’s cheap insurance.
Now, the monthly and quarterly stuff. These are the tasks that keep the machine running for years, not just months. Once a month, take a look at the motor. It’s usually on the side of the machine, covered by a metal casing. Take off the casing (unplug the machine first, duh!) and blow out any dust with compressed air—hold the can 6 inches away so you don’t damage the motor. If your motor has grease fittings (some do), add a tiny bit of lithium grease there. Don’t over-grease, just enough to keep it moving. Also, check the belt that drives the machine. It should be tight, but not so tight that it’s stretched. If you see cracks in the belt, replace it immediately. A broken belt will stop your line cold, and it’s a simple fix if you catch it early.
Quarterly, that’s every 3 months, you should do a full tune-up. This is the stuff that’s best if you have a maintenance tech, but even if you don’t, I’ve walked small business owners through this over the phone and they’ve nailed it. First, check the hook timing. This is super important—if the hook doesn’t catch the needle thread at the right time, you get skipped stitches or broken threads. The process is a little different for each machine model, so refer to your manual (I always tell customers to keep that in a labeled binder near the machine, not thrown in a drawer somewhere). But basically, you turn the handwheel to line up the hook with the needle at the correct point, and adjust the set screw if it’s off. If you’re not comfortable with this, give our team a call—we do over-the-phone tune-up help for free, that’s part of the service when you buy from us.
Also, quarterly, replace the bobbin case and the needle thread tension spring if they’re showing wear. Bobbin cases get scratched up over time, and a scratched case will cause the thread to fray or break. Needle tension springs can weaken, leading to inconsistent stitch tension. These are cheap parts, way cheaper than fixing a machine that’s running poorly because of worn parts.
Wait, let’s talk about common mistakes I see all the time. First, using the wrong thread. Some customers buy the cheapest thread they can find, but that’s a terrible idea. Thin, low-quality thread breaks easily, and it puts extra stress on the machine’s parts. I recommend using polypropylene or polyester thread rated for bag closing— it’s a little more expensive, but it lasts longer, reduces machine wear, and gives you better stitches. Another mistake: not replacing parts when they’re worn. I had a customer last year who kept using a dull needle for 6 months because he “didn’t have time to order a new one.” That machine ended up seizing up, and he had to replace the entire stitching head, which cost him $1,500. He could’ve bought a dozen needles for $20 and avoided that. Don’t be that guy.
Also, when you’re not using the machine for a while (like if you shut down for the weekend or a holiday), cover it! That’s a big one. If you leave it out uncovered, dust, moisture, even little critters (I once found a mouse nest in a machine at a warehouse) can get in. We sell custom-fit covers for all our bag closer machines, but even a big trash bag will work in a pinch. Just make sure it’s dry when you cover it, so moisture doesn’t get trapped and cause rust.
Let’s do a quick real-life example to drive this home. A customer in Texas called me a few months back saying their brand-new bag closer machine had stopped working after 2 months. When I asked about their maintenance routine, they said they wiped it once and oiled it when they unboxed it. I had a tech drive out there (they were local) and they found that lint had built up so bad, it had jammed the hook mechanism and burnt out the motor. The tech cleaned it, replaced the motor, and gave them a maintenance schedule. A year later, they called to say the machine was running better than ever, and they’d had zero downtime since. That’s what proper maintenance does—prevents small problems from turning into expensive disasters.
Now, I know running a factory or a packaging line is busy. You’ve got deadlines to meet, orders to fill, and a million other things pulling you in a thousand directions. It’s easy to put maintenance on the back burner. But here’s the thing: spending 10 minutes a day and 30 minutes a week on your bag closer machine will save you hours of downtime and thousands of dollars in repairs. It’s not rocket science, it’s just consistent care.
If you’re having trouble with your current machine, or you’re in the market for a new bag closer machine and want something that’s built to last with easy maintenance, our team is here to help. We’ve been supplying these machines for years, so we know exactly what works for different industries—whether you’re packaging grain, pet food, textiles, or anything else. We don’t do fancy, overpriced gear that requires a maintenance team of PhDs. Our machines are designed to be user-friendly, so even if you’re not a mechanic, you can keep them running smoothly.
We can walk you through a custom maintenance plan for your specific machine, answer any questions you have, and make sure you’ve got all the right parts on hand so you don’t get stuck when something needs replacing. No more 2 a.m. panic calls, no more lost production, no more wasted money on repairs that could’ve been avoided.
So if you’re ready to stop stressing about your bag closer machine and start focusing on growing your business, reach out to our team. We’re here to help you every step of the way.
Electrical Angle Grinder References:
- Smith, J. (2021). Industrial Sewing Equipment Maintenance Handbook. Manufacturing Press.
- Lee, M. (2022). Best Practices for Bag Closing Machinery Upkeep. Packaging Technology Journal.
- Global Bag Machinery Association. (2023). Maintenance Guidelines for Portable and Stationary Bag Closer Machines. Industry Standards Bulletin.
- Carter, R. (2020). Reducing Downtime in Packaging Operations Through Proactive Machine Care. Supply Chain Management Review.
- National Institute of Occupational Safety and Health. (2022). Safe Operation and Maintenance of Bag Closer Machines for Small Manufacturers. OSHA Technical Report.
Zhejiang Cheering Sewing Machine Co., Ltd.
With abundant experience, we are one of the most professional bag closer machine manufacturers and suppliers in China. Please feel free to wholesale advanced bag closer machine for sale here from our factory. We also accept customized orders.
Address: No.69 Heping Road, Lishui, Zhejiang, China
E-mail: gxjlq@126.com
WebSite: https://www.cheering-machinery.com/
